Showing posts with label crafts. Show all posts

1.28.2014

Painting with Spaghetti

What's that you say? Painting with noodles? It might seem a little weird but the preschool kids really enjoyed it as an after storytime activity.  All it took was some cooked spaghetti, water and finger paint. We thinned out the paint with some water and mixed in the cooked spaghetti. 
Since we don’t have a stove at the library we boiled water in an electric kettle and poured it over the spaghetti, letting it sit until it had softened. Then the kids used the spaghetti to paint.   


We used red, yellow and blue so the kids could experiment with doing color mixing as well. Next time we do this we might try using shaped pasta, so that we can experiment with the different patterns.
 

1.26.2014

A Twist on Finger Painting

 
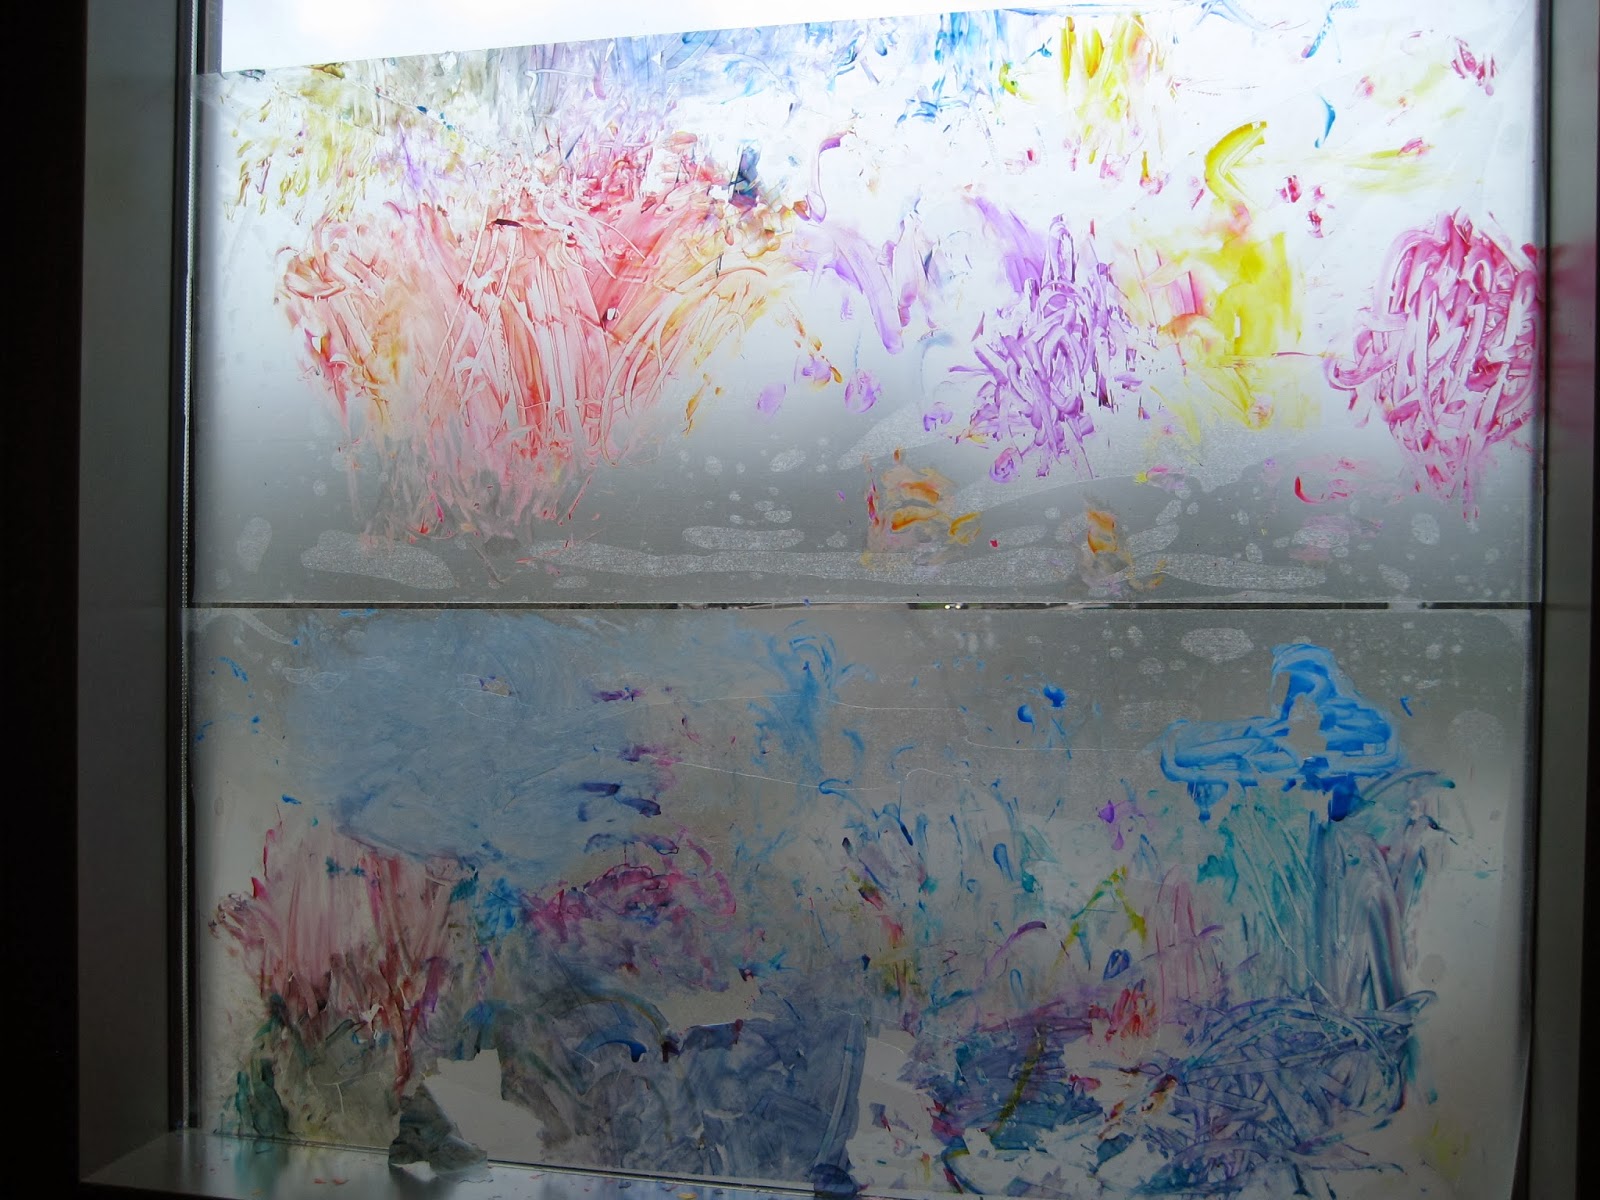
A few weeks ago our storytimes tried a fun alternative to traditional finger painting: finger painting on windows! Doing something that feels naughty is always fun, parents love a mess they don't have to clean up, and you can tie in color mixing conversations for some STEM cred.
How To:
Most of our sessions painted on contact paper applied to the windows beforehand, but some painted right on the windows. When wet, the paint wiped up easily from surfaces but we have yet to wash the windows (I'll post an update when we do letting you all know how clean up goes).
We used Colorations brand finger paint and did test the process out beforehand. We used craft sticks to dish paint into leftover microwave meal containers. Do be sure to put away your supplies or prepare to have families self-serving more paint and using the craft sticks instead of fingers. Some of us laid down paper on the floor in front of the painting to catch messes and some also offered aprons for the kids to wear.
Reflections:
As some of the more heavily painted spots dried, the paint flaked, but this is a case of process over product anyway. It doesn't look as nice from the outside as some of our window activities, but again, process. I think the preschool and family storytime staff weren't a huge fan because of the mess, but the baby and toddler storytime staff had a grand old time. A difference in expectations, perhaps?  The kids loved it almost universally. I had the mom of a toddler tell me her daughter usually hates messy play but couldn't get enough of this activity. Success!

1.16.2014

Krafternoon: Shadow Puppets

At Krafternoon this month we took advantage of the gloomy skies to make shadow puppets. Not a ground breaking idea, I'll grant you, but it was fun to be in a darkened room. Something about it feels special.
We have a large screen (available to borrow locally) that I propped up with chairs and lit using a couple spot lights. It took some fiddling to find the best position for the lights, but that was a good opportunity for STEM-like experimentation. In hindsight it might have been more fun to find a way to raise the screen, but our event was informal and this worked for us.
I also included some images of hand positions to try
I provided several templates of varying degrees of complexity but tried to encourage creativity. One participant made a cat, a mouse, a mouse hole and some cheese to tell a story fraught with peril and suspense! The crowd we got was definitely on the young end though and most preferred to use the templates.
I found templates from the indomitable Martha Stewart, copied a few simple shapes from Jill Bryant's Making Shadow Puppets, and used some complex wild animal templates from Paper Made! by Kayte Terry. One of Martha's shapes is a mermaid and I should have foreseen that it would be the most popular by far. TIP: Make multiple mermaids.
For a cheap, simple program I recommend this event. We already had all the supplies in our closet: black paper, brads, skewers (we used coffee stirrers), tape or glue, scissors, and something to draw with. Shadow play ties nicely to the current trend for STEM programming, appeals to preschool and school aged children, and bolsters literacy through encouraging storytelling.
As a supplement for taking home I provided a handout on how to make your own theater out of a box or cereal box, adapting this set of instructions from Ladybug magazine. A fun way to pass a grey afternoon. 

11.20.2013

October Krafternoon: Monsters


For Krafternoon in October we created monsters from recyclables. Kids chose either a baby food jar or a tissue box to start, as per the instructions on a slide. Though it is becoming harder to get your hands on glass baby food jars, we were gifted just about enough. I didn't collect enough tissue boxes though. Go figure. Using this 
as inspiration I set out the boxes, glue, craft foam, googly eyes, sharpies (rather than paint. Ug), scissors, and an egg carton.
The more popular choice was to decorate a baby food jar and fill it with slime. The slime was flubber using essentially this recipe. The key to making it look cool is clear glue though it did change the consistency somewhat. The flubber didn't hold together as well as when using white glue, but that may have been a brand issue (We had Colorations brand so that's what I used). Anywho, beyond using clear glue, add glitter and use neon food coloring. Ohh. Aah. (Here is the inspiration site, where she uses Crayola glitter glue. Cheater.) I set out a mishmash of other material including more googly eyes and sharpies, feathers, cupcake liners, tissue paper, paper scraps, and so on. Tons of fun and I had to make several more quick batches of slime to satisfy my customers. It was a nice chance to try all the colors in my new neon set and they were all awesome.

9.26.2013

An American Girl Afternoon

After a Star Wars program and some Angry Birds fun, we thought maybe we should have a girlier program, whatever that means. We set about planning a non-tea American Girl program. I say "non-tea" because that seems to be the library AG program of choice, but with a drop-in format and a "no food" rule, a tea simply wouldn't fly.
We invited school age patrons to bring their dolls with them and several did. For those not lucky enough to afford such a doll, we offered a copyright free paper doll printed on card stock to decorate with colored pencils and fabric scraps. Even those who brought a doll had fun making a paper version, and I was glad I included some boy dolls as we had maybe half a dozen young men join us.
We displayed nonfiction titles that patrons might not be as familiar with and for once, books were actually checked out as a direct result of a program! We borrowed a couple dolls from staff to display. One was even a retired girl, so it was fun for everyone to see. Running on our projector was a slide show adapted from the American Girl website, with an illustration and fun facts about each of the characters. It was fun to hear attendees get excited when their doll came up.
The most popular activity was a matching bracelet set for guests and their dolls. American Girl dolls have a 3 1/2 inch wrist, FYI. We set out elastic, pony beads, and letters beads. We asked folks to use initials rather than full names to conserve limited supplies and with just one package we were fine.
We put out hand mirrors and hair elastics along with a couple simple hairstyle tutorials from the American Girl magazine. Some girls did their friend's hair, some did their doll's hair, and others had mom help do their own hair.
On the same table was a set of AG personality quizzes, also from the magazine. Not very popular. We pulled in our hopscotch rug and posted the traditional rules as a historical tie-in, but again, not very popular.
The final element was a photo prop, a box painted like a real American Girl doll box. Kids could step inside while their parents snapped a photo of their precious little one as a real live American Girl doll on their ubiquitous camera phones.
I was worried there wasn't enough to do, but we had about 70 people and they stayed between 20 and 60 minutes. Success!

9.03.2013

Pinterest tips & tricks

Did you know Pinterest is not just for nail art inspiration and single ladies planning dream weddings? No! A lot of people use it the plan programs and displays. You can find many cool ideas especially for library staff. You can also collect useful tips. Here's a roundup of some of my favs:
  • On a budget and want to get your hands on liquid watercolors? Take old washable markers, rubber band them together, and stick them tip-side-down in water over night. In the morning, you'll have washable liquid watercolor. The instructions I found said to use at least 6 markers, but I tried it with as little as 3 and still got good results. I was even able to soak my batch of markers twice to get two containers of each color. Nice!
  • Want to bead with little ones? Dye pasta instead of buying beads. All you need is toddler or preschool friendly pasta, some of the liquid watercolor you just made (though you can use food coloring, too), and rubbing alcohol. This also works with rice for fun toddler sensory play.
  • Have a bag of chalk that looks a little muddy. Throw some rice in the bag to "clean" the chalk and you can tell what color you're dealing with again.
glitter optional
  • In need of a sign holder, but all your nice acrylic ones have wandered to other departments? Use a laminated or card stock sign and a large binder clip. Viola!
GLUE <gets its own section>
  • Here's an oldie but a goodie. Do you find yourself dreading the use of white glue but really want to do an activity that requires it? Buy or collect cheap plastic tupperware, cut sponges to fit the containers, and add glue. Kids touch their item to the glue sponge rather than using a bottle. After use and before storing, dampen the top sponge a bit. After you've use your sponge awhile, flip it. Pinterest says it'll keep a long time.
  • Now that you've got some empty glue bottles, re-purpose them. We all know how much kids like to squeeze and squeeze and squeeze....Rinse the empties and add paint. OR add paint to half-full bottles for a thicker concoction. Play with it! Paint by squeezing really builds strength in your hands.
  • Have clogged tips got you down? Remove glue bottle lids, rinse and clear them, drag them through a container of veggie oil, give them another quick rinse, and put them back. Clogs no more. 
There are so many more wonderful ideas. Here's a link to one of my library related boards. If you visit, don't judge my nail art.

8.06.2013

Summer Krafternoons

Some of our popular craft programs in recent months have been

sand & shell art - A co-worker donated a large sack of sand dollars and we water colored on them. We also found a stash of glass test tubes in our closet with no discernible purpose. So, we purchased stoppers and colored sand and let the kids create layered sand art in them. The test tubes were VERY popular with kids wanting to do several of them. 

plant pals & food stamping - Using pantyhose, cups and grass seed as a base, we created creatures. Using rubber bands, kids also created facial features like the nose on our sample. Given some water and a day or two, the creatures grow grass hair that can be trimmed.
For the younger set we inevitably get at this school-age program in summer, we put out large stamp pads, paper and cut-up fruit and veggies for stamping. We used the traditional apples and potatoes, as well as celery hearts, pepper slices, and mushrooms.

cave painting & rock art - For a paleolithic art experience, we had kids lie on their backs to create art inspired by cave paintings from around the world. A slide show ran throughout the program to provide inspiration and we displayed books as well. 
I found a TON of brown paper sacks in our closet so I cut the bottoms off, opened them up, and used masking tape to tape them under tables. Butcher or kraft paper would work as well. Rather than the usual markers or colored pencils, we ordered a classroom pack of oil pastels and I put out black, white, gray, brown, and red, to keep the look authentic. 
For another unusual art experience, I put out some smooth stones and colored pencils. I did rough up the polished stones with sandpaper for a better result. We used the cheap pencil sets we had on hand, though fancy prisma colors create a beautiful product. We also didn't seal them and as a result too much handling did smudge and fade the designs. 


Happy crafting!


5.13.2013

Krafternoon

Krafternoon meets every 3rd Wednesday from 3 to 5pm in our Programs Room. It's a drop-in program for school agers up to 12 years old. As with all our programs, there's no cost or registration. We typically set up 4-6 tables and a few chairs per table. We've recently begun playing kid-friendly music through our sound system to make the program seem more fun and inviting.
This program is staffed by one person each hour and kids get to take their creation home. While in the past we've had events that span multiple sessions (such as papier mâché) these are primarily one-off activities.
In the past we've printed directions for each table, but since getting our program room technology functioning, we're able to project directions and inspiration images on the wall. We still make some use of printed signs when there is more than one option for the day. My co-worker and I will often make a prototype but rarely display it to encourage creativity by minimizing copying.
Some of the activities we've done include:
  • creating with Crayola Model Magic clay - This clay air dries and can be painted after drying. We provided instructions on painting creations at home. We originally purchased this supply for a spooky pen, one of my personal favorite projects.
  • creating a mural for our office windows out of contact paper and die cut shapes - This was done to promote our publicly available die cut machine. (More on that in a future post)
  • miniature works of art and tiny easels to display them on
  • building with marshmallows and toothpicks
  • painting with marbles
  • blown ink art - This proved a challenging concept for a lot of the early elementary participants. We used watered down tempera paint, dropped it on paper with the end of a straw, and used the same straw to blow the paint around. After it dried, we provided markers and paper to turn the resulting blob into a creature. Here is my inspiration.
  • gooey fun with flubber, oobleck and homemade playdough - Very messy and very fun, we provided  playdough, tools and oobleck-making materials to use in the room, and set up a station to make flubber to take home. Here's where having a sink in the Programs Room comes in very handy.
  • grab bags - This simple event took advantage of leftover supplies, as well as a HUGE stash of paper sacks. Each bag was loaded with a random assortment of supplies. We set out things like glue, scissors, and markers on each table. After selecting a bag (no peaking!), each person got to work creating something. Unwanted items could be placed in a community pot for use by someone else.
Last summer, this event focused solely on open play with recyclables. It was fun to see what the kids came up with, but it was a lot to collect and store. 

We'd love to share more details on any of these events. Comment below to get in touch!